
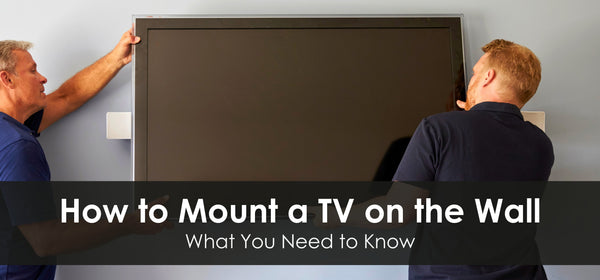
How to Mount a TV on the Wall: What You Need to Know
Mounting a TV on the wall is a great way to save space, enhance your viewing experience, and create a sleek, modern look in any room.
Although the process may seem intimidating at first, with the right tools and clear instructions, anyone can achieve a professional result.
In this guide, we will walk you through each step of the TV mount installation process, from selecting the best location to securely attaching your TV.
We will also cover typical issues and troubleshooting tips, ensuring a smooth and hassle-free installation. Let us help you mount your TV and get it ready to enjoy.
Step 1: Choose the Right TV Mount
Choosing the right wall-mounted TV lift is crucial for a successful installation. There are four main types of TV mounts to consider: fixed, sliding, tilt, and full-motion.
-
Fixed Mounts: Keep your TV flush against the wall for a clean, minimalist look, but offer no angle adjustments.
-
Sliding Mounts: Allow you to adjust the TV horizontally for better positioning.
-
Tilt Mounts: Offer vertical adjustments to reduce glare and improve viewing angles.
-
Full-Motion Mounts: Provide the most versatility by allowing adjustments both horizontally and vertically.
When selecting a TV mount from these options, consider your TV size, room layout, and preferred viewing angles.
Additionally, make sure the mount has a weight capacity that supports your TV set and matches the Video Electronics Standards Association (VESA) pattern for easy installation. For a selection of high-quality options, check out wall-mounted TV mounts.
Step 2: Pick the Best Wall Location for Your TV
Taking the time to find the optimal location will improve both the functionality and visual appeal of your setup.
When considering where to put a TV in the living room with windows, look for a spot that minimizes glare. Ensure that the TV is also positioned at a comfortable height, ideally at eye level when seated.
If you’re setting up outdoors, an outdoor video wall lift is a great solution. These TV lift mechanisms allow you to adjust the position of the TV to find the best angle and minimize glare.
Step 3: Gather the Necessary Tools and Materials
Before you begin mounting your TV, it is crucial to gather all the necessary tools and materials.
Having everything ready will make the installation process go smoothly and ensure a secure, stable mount. Here’s a list of the essential items you will need to get the job done:
-
Stud Finder: To locate secure spots for mounting on the studs
-
Level: Ensures your TV mount is straight and properly aligned
-
Drill: For making small holes in the wall to secure the mount
-
Screwdriver: To tighten screws and secure the mounting bracket
-
Measuring Tape: Helps position the mount at the right height and alignment
-
Wall Anchors (Optional): For mounting on drywall when studs are not available
Most TV mounts come with hardware. However, extra wall anchors may be necessary for added support and security.
Step 4: Locate the Studs and Mark the Mounting Points
Accurately marking the mounting points accurately will help avoid errors and ensure a secure and reliable installation.
Use a stud finder to locate two studs in the wall where you plan to mount your TV. These studs will provide the support necessary for a safe installation.
Once you have identified the studs, use a pencil to mark the drill points for the mounting bracket. Check with a level to ensure the marks are level, as the TV will be positioned straight.
It is important to double-check the height before drilling to ensure the TV will be at the desired viewing height. Additionally, avoid mounting your TV directly on drywall alone without proper anchors, as this may compromise its stability.
Step 5: Attach the Mounting Bracket to the Wall


Now that you’ve marked the drill points, it’s time to attach the mounting bracket to the wall. Use a drill to create tiny holes at the marked points and ensure that they align with the studs.
Secure the bracket with lag bolts to provide a strong, stable hold for a stud-based installation.
If you are mounting on drywall or another surface without studs, use heavy-duty anchors instead to ensure the mount can support the TV’s weight.
Afterward, double-check the level to ensure the bracket is aligned correctly before tightening everything down. Once everything is aligned and level, tighten the bolts or anchors securely to attach the mounting bracket to the wall firmly.
Step 6: Secure the Mounting Plate to the TV
Next, attach the mounting plate to the back of your TV. Use the correct screws provided with your TV mount, ensuring they are the right size for your TV set.
Align the plate with the mounting holes on the back of the TV, making sure it is properly centered. Double-check that the plate is securely fastened before proceeding.
Be careful when lifting and attaching the TV to the wall mount to ensure everything remains secure throughout the process. Remember that proper alignment and careful handling will help prevent any issues during installation.
Step 7: Hang the TV on the Wall Bracket


To hang the TV on the wall bracket, carefully lift the TV and align the mounting plate with the bracket. If your TV is large or heavy, it is highly recommended to have a second person assist with the process to ensure safety.
Gently place the TV onto the bracket, making sure it is securely seated. Once the TV is in place, double-check that the mount is stable and the TV is level before letting go.
Give the TV a slight tug to confirm that it is properly attached to the wall mount. These steps will ensure the TV's security and reduce the risk of accidents or damage.
Step 8: Conceal Cables for a Clean Look
Concealing cables enhances the aesthetics of your TV installation while keeping your space tidy.
You can use in-wall cable management kits to hide cables inside the wall for a polished look or opt for a power bridge kit to conceal both power and HDMI cables.
For a completely wireless setup, consider using wireless HDMI transmitters to avoid visible cables.
Troubleshooting Common Mounting Issues
Even with careful installation, some common issues may arise. Here are solutions to these frequent problems:
TV Is Not Level After Mounting
A slight misalignment often occurs if the mount is not leveled before drilling. To fix this, loosen the screws slightly and adjust the tilt of the TV to ensure it is level.
If the wall is uneven, use spacers to correct the alignment. Double-check with a level tool before tightening everything down to ensure the mount is aligned correctly.
TV Feels Loose or Wobbly on the Mount
If your TV feels loose or wobbly, it is likely due to improperly tightened screws or bolts. Check all connections, including the mounting bracket on both the wall and the TV.
Tighten all screws and ensure the mount is secure before use. Some mounts also include locking mechanisms that must be engaged for additional stability.
Can’t Find Studs or Missed the Studs When Drilling
Missing a stud can make the mount unstable. Use a stud finder to recheck the locations of the studs, then drill new holes in the correct spots.
If the studs are still inaccessible, consider using toggle bolts or a mounting plate to distribute the weight more evenly and provide additional support.
Mounting on Drywall Without Studs
Mounting on drywall alone without studs is not recommended, as it cannot support the weight of most TVs.
It is advised to use high-quality toggle bolts or install a plywood mounting board secured with multiple anchors to distribute the weight. Avoid using regular drywall anchors, as they may not hold the weight over time and could cause the mount to fail.
TV Won’t Attach to the Bracket Properly
If the TV does not attach properly to the bracket, check for VESA compatibility.
Ensure the bracket is aligned with the mounting holes on the TV and that you use the correct screws provided with your mount, as different TVs may require other sizes.
If the bracket still does not fit, refer to the instruction manual for adapter plates or alternative mounting solutions.
Cables Are Exposed and Messy
Exposed cables can ruin the sleek look of your TV mount. To hide the cables neatly behind the wall, use cable covers or an in-wall cable management kit.
For excess cable length, consider organizing it with zip ties or Velcro straps. If hiding the cables behind the wall is not an option, consider wireless HDMI solutions for a cleaner setup.
Panel mechanisms can also help hide components or allow for easier access to the TV when adjustments are needed.
Drilled the Wrong Hole or Made an Extra Hole in the Wall
Mistakes like drilling the wrong hole or making extra holes in the wall are common but easy to fix.
Use spackle to fill in any unwanted holes, then touch up with paint to match the wall color. If needed, drill a new hole in the correct spot and use a wall plate to cover any visible mistakes for a clean finish.
Frequently Asked Questions (FAQs)
In this section, we answer common questions about how to mount a TV on the wall.
Do You Need a Stud Finder to Mount a TV?
While a stud finder makes locating studs easier, it is not strictly necessary. You can also use the tapping method, which involves listening for a solid sound when tapping the wall.
Another alternative is driving a small nail to confirm a stud’s position. However, if no studs are found, use heavy-duty anchors or a mounting plate for added support.
Can You Mount a TV Without Drilling Holes?
Traditional TV mounting requires drilling small holes, but there are alternatives.
Adhesive-based mounts, no-drill TV stands that lean against the wall, or tension-mounted solutions can be used. However, drilling into studs provides the most secure and stable installation.
How High Should You Mount a TV on the Wall?
The ideal TV height is around eye level when seated. In most living rooms, the center of the screen should be about 42 to 48 inches from the floor. For comfort, slight angle adjustments may be needed in bedrooms or above fireplaces.
Key Takeaways on How to Mount a TV on the Wall
Successfully mounting a TV on the wall requires careful planning and attention to detail. This starts by choosing the right TV mount that fits your TV’s size and weight.
Afterward, secure the mount to studs for stability, and ensure the TV is placed at the right height for comfortable viewing. Concealing cables will also give your setup a clean, modern look.
Remember to take your time with measurements and double-check your work to avoid mistakes. With the right tools and instructions, you can achieve a professional-looking installation.
For those seeking added convenience, search through Auton’s motorized TV mounts for advanced functionality and a premium experience. We also offer panel lifts and ceiling flip-down TV mounts for various setups.
Trust that our experts at Auton can help you figure out how to build a recessed TV wall and answer any other concerns you may have.