
How to Make a DIY Outdoor Movie Screen: A Guide
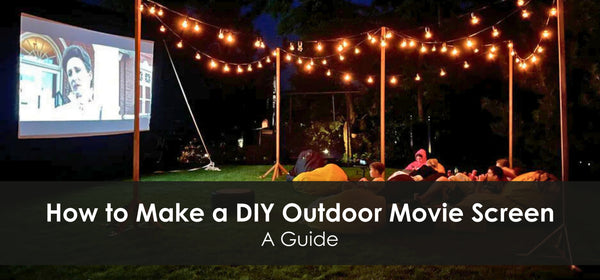
Few things compare to the joy of watching a movie under the stars with family and friends.
Creating a DIY outdoor movie screen allows you to enjoy this experience right in your backyard.
With the right materials and a little effort, you can build a screen that meets your needs.
This guide explores several methods for making an outdoor movie screen, ranging from simple setups to more durable and professional-looking options.
Materials and Tools You Will Need
Gather all the necessary materials and tools before starting for a smoother build process. The materials you choose will affect the screen material’s durability, the overall image quality, and the ease of setup.
Some essential materials for this DIY outdoor movie screen project include:
-
PVC pipes: These provide a lightweight and portable frame for the screen.
-
Blackout cloth: This is the best material for a crisp, high-quality projected image.
-
Wood planks: These create a sturdy and permanent frame for the screen.
-
White sheets: A DIY screen option that is budget-friendly but offers lower image quality compared to blackout cloth.
-
Fasteners: Items like bungee cords, zip ties, or clamps help secure the fabric in place.
-
Hooks or nails: These are necessary for hanging the screen securely on the wall.
For essential tools, make sure to have the following:
-
Saw: Use this to cut PVC pipes or wood to the desired size.
-
Drill: This is needed for assembling wooden frames securely.
-
Measuring tape: Ensures precise cuts for a well-fitted screen.
-
Clamps or bungee cords: These help hold the screen fabric in place during assembly.
-
Staple gun: Use a staple gun to attach the fabric firmly to a wooden frame.
Choosing high-quality materials ensures your DIY outdoor movie screen delivers clear images.
If you want a more permanent and high-end home theater setup, our home theater cost guide breaks down what to expect.
Option 1: PVC Pipe Frame Screen
A PVC pipe frame is one of the easiest ways to build a portable outdoor movie screen. This option is lightweight, inexpensive, and easy to store when not in use.
Here’s how to construct this option:
-
Measure and Cut the PVC Pipe: Start by determining the desired screen size, with common options ranging from 100 to 150 inches. After choosing the dimensions, carefully cut the PVC pipes to form a sturdy rectangular frame that will serve as the foundation of your screen.
-
Assemble the Frame: Connect the pipes using elbow and T-joints. For stability, reinforce the corners with additional fittings.
-
Attach the Screen Material: Stretch a white sheet or blackout cloth over the frame and secure the fabric with bungee cords or zip ties to prevent sagging.
-
Anchor the Screen: Use sandbags or stakes to secure the frame against wind and position the screen on level ground to prevent tipping.
This DIY outdoor movie screen option is a great idea for a portable and easy-to-store setup.
For those looking to enhance their backyard home theater, our step-by-step home theater building guide offers more inspiration.
Option 2: Wooden Frame Screen
A wooden frame can provide homeowners with a sturdier and more permanent outdoor movie screen.
This setup is ideal for a long-lasting outdoor theater experience. Here are our step-by-step instructions:
-
Measure and Cut the Wood: To create a strong and reliable frame, select 2x4 wooden planks that provide the necessary support. Carefully measure and cut the planks to the desired dimensions. This ensures each piece fits together seamlessly for a solid frame.
-
Assemble the Frame: Secure the wood pieces together using screws and a drill, ensuring each joint is tight and properly aligned. A square and sturdy frame prevents wobbling or misalignment, which could affect the viewing angle and projected image quality.
-
Attach the Screen Material: Firmly staple blackout cloth or white fabric to the frame and keep it pulled taut for a smooth projection surface.
-
Weatherproof the Frame: Finally, apply a waterproof stain or paint to protect the wood from moisture and weather damage. This treatment will ensure your frame withstands the elements during outdoor movie nights.
This DIY wooden outdoor movie screen is a fantastic option for those seeking a permanent backyard setup.
Option 3: Hanging Sheet Screen
For a quick and simple outdoor movie setup, a hanging sheet screen is the easiest method. The steps for this option include:
-
Find a Suitable Location: Choose a support structure like two trees, a fence, or a sturdy clothesline.
-
Hang the White Sheet: Secure the white sheet using clamps, hooks, or bungee cords. Ensure the fabric is pulled taut to avoid wrinkles and distortions in the projected picture.
-
Stabilize the Screen: Attach weights to the bottom corners to prevent movement during use.
This method is ideal for homeowners who want a cost-effective and temporary outdoor movie screen that still offers a great viewing angle.
Setting Up Your Outdoor Movie Screen


Once your DIY screen is ready, it’s time to set up the rest of your outdoor movie theater for the best viewing experience.
Choose the Best Location
Pick an area with minimal light pollution for optimal screen brightness.
There must be enough space to accommodate seating and comfort for everyone. Positioning the screen against a flat surface for enhanced stability.
Ensure a Stable Surface
Setting up the screen on level ground is crucial to prevent tipping. For added stability, secure freestanding screens with stakes or sandbags, especially in windy conditions.
Positioning the Projector
To achieve the best projected image quality, position the projector at an optimal distance based on its throw ratio. Carefully adjust the height and angle to ensure a sharp, well-aligned picture.
If positioning allows for it, you can also incorporate a projector lift for a cleaner entertainment space.
Arranging Seating for Optimal Viewing
Use a mix of outdoor chairs, blankets, and inflatable loungers to create a comfortable seating arrangement.
This setup ensures that everyone has a clear view of the screen during outdoor movie nights.
Enhancing Your Outdoor Theater Experience
A well-planned setup will elevate your outdoor movie night experience.
For those looking for a more professional outdoor movie setup, consider using an LED video wall lift for a seamless and high-end viewing experience.
Create Comfortable Seating
Use outdoor cushions, blankets, and reclining chairs to create a cozy seating arrangement. Waterproof seating options add durability.
Improve Sound Quality
For greater audio clarity, use Bluetooth or wired speakers for a surround-sound experience. This will also ensure that dialogue and sound effects are crisp and immersive.
Place any speakers near the audience for evenly distributed sound and a balanced listening experience.
This enhances the overall audio quality during movie nights.
Weatherproof Your Setup
Protecting your electronics is crucial. Use waterproof covers to shield your projector and speakers from unexpected moisture.
Remember to also check the weather forecast before setup to avoid disruptions.
For a sleek and protected outdoor theater, an automated TV lift mechanism or even a floor or ceiling TV lift will allow you to safely store and reveal your screen at the touch of a button.
Add Ambiance and Practical Lighting
Hang string lights, lanterns, and LED path lights to create a cozy and inviting atmosphere.
This lighting not only sets the mood but also ensures safe movement around the viewing area by preventing trips and falls in the dark.
Keep Bugs Away
Use citronella candles and bug sprays or mosquito-repellent devices to keep insects at bay, ensuring uninterrupted outdoor movie nights.
Maintenance and Storage Tips
Proper maintenance ensures your outdoor movie screen lasts for many enjoyable movie nights.
Cleaning the Screen
Gently clean the screen using a damp cloth and mild soap to remove dust and stains. Avoiding harsh chemicals is key to preserving the quality of the screen material.
Proper Storage
Carefully roll or fold the screen to prevent creases that might affect image quality. Store it in a dry place to stop mold or mildew buildup, and keep it in excellent condition for future movie nights.
Protecting Against Weather Damage
Protecting your outdoor movie screen from the elements ensures its longevity.
For permanent setups, use weather-resistant covers to shield the screen from rain and harsh sunlight. If your screen is portable, disassembling it after each use helps prevent wear and tear.
Frequently Asked Questions (FAQs)
How Do I Prevent Wrinkles in a DIY Outdoor Movie Screen?
Using blackout cloth or a tensioned frame helps create a smooth and professional-looking projection surface. Stretching the fabric tightly with bungee cords or clips prevents wrinkles and creases from forming, giving a clear picture.
What Is the Best Fabric for an Outdoor Movie Screen?
Blackout cloth is the best option for reducing light penetration and ensuring high-quality projection. Alternative options such as white spandex or vinyl can also provide a smooth and reflective surface for watching movies outdoors.
Can I Use a Bed Sheet for an Outdoor Movie Screen?
While a white sheet can be used, it may allow too much light to pass through, reducing image quality. Using a double-layered sheet or opting for blackout cloth improves the overall picture.
Final Thoughts on DIY Outdoor Movie Screens
Building your own outdoor movie screen is a rewarding and cost-effective project.
Whether you choose a PVC pipe frame, wooden frame, or a hanging sheet method, you can create a high-quality projector screen that brings outdoor movie nights to life.
With the right setup, you can enjoy endless movies under the stars with family and friends.
For those who want to elevate their home theater experience further, check out Auton’s product selection.
We offer innovative, high-quality solutions for hidden TV lifts and projection screens, helping you create a seamless and professional viewing experience in any space.